Sunday, August 19, 2012

Lemonade, Cake, Mason Jars, and Birthday Fun

Yesterday was my mom's 50th birthday!  And of course, we had a party!!  If you look back to last fall, we threw my dad a 50th birthday party with a fall theme- chili, campfire, cake, etc.  It was a lot of fun so I was really looking forward to throwing my mom a party too!  I don't know how excited she was about turning 50, but hey, she's becoming a grandma this year, so that has to make it a bit better I think. :)  I was excited because I love summer parties.  I think there are so many cute ideas out there.  I started planning this party in May after getting an issue of Better Homes and Gardens with all sorts of ideas.  Here are just some of the festivities from the day...


Due to the medicine my mom takes for her migraines, she cannot drink pop.  It tastes metallic (yuck!).  So I had seen a couple of different lemonade recipes and ideas on pinterest and in my lovely issue of Better Homes and Gardens.  I decided to have a lemonade bar.  We had regular lemonade, strawberry lemonade, and blueberry lemonade.  We also had sweet tea.  (I'll include the recipes for the lemonades at the bottom of the post).  I used some doilies we had received from our wedding, along with daises and floating candles in Mason jars to create our table.  Here was the finished product....

I loved the little pennant border along the table as well-  thanks to My Mind's Eye paper and my Cricut :)

I also adore Mason Jars.  I think they are so cute and classic.  So, I wanted to tie them into the party somehow.  I bought two cases of pint sized jars (thank you to canning season almost being over and Walmart having them on sale!).  My hubby actually was really good at stamping tags, so we cut and stamped tags for everyone to write their name on, and we cut ribbon to tie the tags onto the jars.  When our guests came up to get lemonade, they had to grab a tag, write their name, tie it onto the jar, and voila!  No mixed up Mason jars! Here's a pic...

Lemonade was not the only thing we served though!  We had some yummy snacks as well.  We had veggies and dip, buffalo chicken dip, fruit slush, chips and salsa, and cheeseball & crackers (thank you to my brother's girlfriend Raeanne for bringing this yumminess!!)  Here's the food table.  I just couldn't resist!


And of course, we had cake!!  Funny story there... my whole family loves Marsh cakes, mostly because of the icing.  We are buttercream icing freaks.  None of that whipped stuff for us.  Well, I ordered the cake on Thursday and said specifically, we want buttercream icing.  No problem.  On Saturday, Coop, Raeanne, and I went to Marsh to pick it up, along with daisies and the seemingly hard to find blueberries.  I got a glimpse of the cake and all looked great.  However, when we got home and opened the box to put it out, I thought the icing looked awfully soft and shiny.  Yup, whipped icing.  So at this point, it's 1:15, the party starts at 2, and I have a cake that I know people will eat but not love.  I quickly called the bakery department and asked if there was anything they could do.  Amazingly, they said give us 20 minutes and we'll have a correct one ready.  Colby went to get it (along with the ice cream that I had completely spaced- thank you baby brain!) and all was well.
Behind the cake table, I ran ribbons across the window and used clothespins to hang pictures of Mom growing up along with recent ones too.

Oh, and those pretty flowers?!  Present from my dad for Mom that matched the theme and the colors perfectly- way to go Dad!!

As for the lemonade recipes... I made "homemade" lemonade using this recipe:
First, I made a simple syrup.  Heat 1 cup of water and bring it to a boil.  Whisk 2 cups of sugar in and heat until dissolved.  Let it cool.  (This can be stored in the refrigerator for quick lemonade).  I tripled this recipe.

Then, I poured 5 cups of water, 3/4 cup of lemon juice, 1 cup of the simple syrup, and ice cubes into a pitcher and stirred well!  To make the strawberry/blueberry/whatever berry you like lemonade, we mashed the berries (whole package) in a bowl, mixed it in with a small cup of lemonade, and then added it to the pitcher.  Yum!!!

All in all, it was a beautiful day!  We had a great time seeing Mom enjoy her day and the weather couldn't have been more perfect.  We ended the night having a little fire and enjoying some more family time.  Happy 50th Birthday Momma!


Wednesday, July 25, 2012

Love Story Project

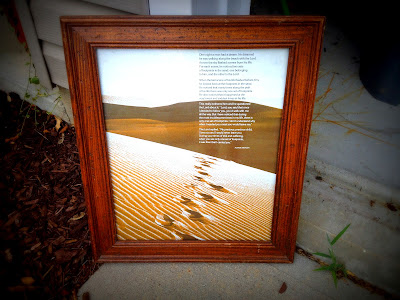
So here I was last week, surfing pinterest, pinning far more things than I have time to accomplish, when I see a frame with a quote in it that I loved.  It said "Every love story is beautiful but ours is my favorite."  Well you can bet I clicked on that link as fast as I could (and pinned it of course!).  It took me here.  It was a online vintage boutique that sold the frame, but of course, they were sold out.  I had gotten my hopes up a bit because I have been looking for something new to hang over the headboard in our bedroom.  The frame we had there just seemed too small and boring.  I studied the picture for a while and decided that it would not be difficult to make, especially since I made a similar project for the nursery just a couple of weeks ago.  So I set out Sunday afternoon to see what I could find to make this work.

I began at Goodwill and found a frame that was perfect.  It was brown and a little beat up, but I was going to distress it a little anyway.  It already had character.  The frame was big too.  I wasn't going for an 8x10, more like a 16x20 or bigger.  I found it!  And it was only $10.

I got it home and washed it up.  Let me tell you, the prints behind the frame were way outdated so who knows how old this thing is!  I removed the glass, threw away the prints, and began painting the frame.  This took a few coats.

I left the frame to dry and came inside with the glass.  On the computer, I went through all the fonts I have and found the two that would be perfect for the print.  I typed up the quote and then resized everything (to 130+).  I printed it off and cut out the words.  The last step was to tape them to the back evenly.

The last step (and the longest) was to trace over the words with black Sharpie marker.  (Brand new markers with sharp points are a good idea.)  I have found that it works best to trace over it once, then go back over carefully to darken the lettering.  I added a few of my own touches to the letters.  Boy, I missed being able to lay on the floor on my stomach while doing this!  Baby boy would not have liked that very much :)

When all the lettering was traced and dry, I checked it one more time for empty spots.  Then I got my dry frame, used some sandpaper to distress the edges and give it that worn look.  I used a hammer again to bend the frame hooks backwards away from the glass.  Then, I lined the edges with glue and laid the glass in the frame to dry overnight.

I put it on the wall this morning right above our bed, and I love love love it!  And it was super easy and cheap!  Grand total- $10 for the frame!  Woo!!


I know people were asking on Facebook how to do this so I hope this explains it well! :)  I hope you are inspired to make one of your own- they are so much fun! And addicting!


Wednesday, July 18, 2012

Picture Frame Project (And Updates!)

Well we've had quite the exciting weekend... It flew by in a flash!  We drove to New York Friday afternoon and got there about 9:30.  The next morning was my first baby shower! :)  Colby and my dad played in a church golf tournament while the girls all went to the shower.  It was a lovely brunch shower and we were so blessed to receive a lot of things we will be needing here in 3 short months!! (wow! 3 months!)  We headed home Sunday afternoon after church.  I will be honest and say I had a moment going home... like a serious pregnant lady moment.  I think because we stayed for church and I am used to leaving early on driving days, it felt like we had been driving ALL day rather than the few short hours we had been.  At about 5 o'clock, somewhere in the middle of Ohio, I was almost freaking out, "I have to get out of this car!!!" Haha :)  Poor Colby...

After we got back, it didn't really slow down!  Again, I felt so bad for Colby because he got called into work at 11:30 Sunday night and didn't get home until 3:30 a.m.  Needless to say, he was pretty tired Monday.  I had a doctor appointment on Monday morning and I was so thankful to hear the doctor say that everything was looking great! :)  Baby boy's heartbeat was 146 bpm and he is growing at a wonderful rate!  All is good, and we couldn't be happier or more thankful.  We also got to pick up the crib Tuesday afternoon and put it together!  I washed all the bedding we got this weekend (thanks Momma!) and had it ready for today when Colby got home with the new mattress.  The nursery is really coming together and looking amazing! (Pictures further down!)

Today, I decided to work on a project from an idea I had discussed in my last post.  I wanted to make something with the phrase "I love you to the moon and back."   Well, I had found some cute things online but didn't want to pay for them.  I'd looked at stickers in Hobby Lobby but letter stickers sometimes look a little iffy because of the way they are cut.  Suddenly, I remembered I had seen a pin on pinterest where someone had used Sharpie markers to draw owls on the glass of a picture frame and then had left the backs off.  It got my brain going and here is what I came up with...

I started with a frame I had bought at Goodwill for $1.50.  (Wooo!)   I took out the glass and backing and repainted the wood white.  (I also cleaned the glass.)


On my computer, I used the font "Pupcat" and wrote out the words "I love you right up to the moon and back" and I found a little crescent moon clip art that I thought was cute.  Then, I printed the pages, cut out the words and taped them to the back of the glass.  Then, using a brown Sharpie marker, I began tracing the letters and coloring them in.  I switched to the light blue Sharpie for the moon and stars.


When it was all done, I used clear adhesive to secure the glass back inside the frame and it is ready to hang up in baby boy's room!! :)  I wasn't sure how it would turn out but I am pretty happy with the finished product!


Sorry for the shadow... the flash made the letters look odd.  One of the most exciting things was the total cost: $1.50!! I had everything else on hand or made it on the computer! Yay!

Here are some pictures to update you on the progress of the nursery... :)


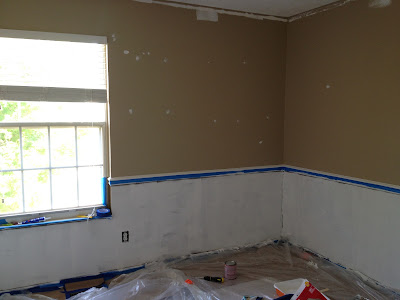
Our before picture... (walls were tan above the chair rail and dark brown below)


After!!  We are so happy with the colors and love how bright the room is!

More to come later!  Hopefully you are getting some of this wonderful rain tonight! I have forgotten what rain sounds like... it's nice to be reminded.


Wednesday, July 4, 2012

Baby project ideas

As I said in my last post, my plan was to make a list of projects I wanted to complete before the baby is born, or at least soon after he is born - since some of them require the baby :)  Needless to say, I've found a ton of ideas.  Narrowing them down has been the hard part!  I keep reminding myself... there are only 4 walls in his nursery... I don't want to cram every inch with stuff... only limited space...    I'm not sure how well it's working!  Anyway, here are the wonderful ideas I've found on blogs and on pinterest.  I cannot wait to get started!


I have been on the look out for the perfect frame to go around the letters of our little guy's name.  Unfortunately, since we are keeping his name a secret, I won't be able to put it up until after he is born :)


I love this saying and I want it to be up somewhere in his room, so I'm considering making this myself with scrapbook paper and sticker letters.  This one is from etsy.com


If you know my hubby at all, this would be a must have :)  Sadly, there aren't anymore for sale on etsy.com where I originally found it.  Anyone crazy good at crocheting and want to make this adorable helmet for our little guy? :)  Goodness only knows you would not want to see what it would look like if I tried it!


Here are some things I can't quite complete until baby boy is here...


Love, love, love this! We already have the baseball!!


I can't wait to have his newborn photos taken (speaking of which- would love any recommendations!) and then I want to create a collage of pictures on the wall.
(I can't find the original link, sadly)


And the finale, the one I think I am most excited about, is a shadow box.  I love how everything is laid out, and I can picture having one of these for each of our kiddos hanging on the wall in the hallway.  Super excited about this idea- buying the box soon!!

Well here are my favorites I have found so far... I'm sure there will be more as it gets closer.  25 weeks tomorrow!  That means only 15 left! Wow!!! :)  Little guy has been kicking this whole time I've been writing this post- he must know it's about him :)

Hope everyone has a fantastic 4th of July and stay cool!!


Thursday, June 21, 2012

Nursery Ideas!

As I mentioned in my previous post, I am so excited to begin repainting/decorating/crafting for our baby boy's nursery!  I have a lot of ideas, and I am trying to make them all come together to form a cohesive, sweet room for our little one.  The first decision I wanted to make was the colors.  I wanted to tie in a little blue, but I really love the brown, tan, green, blue combinations, so that's where I began.  Our nursery has a chair rail, which I love, so my thought is we are going to paint the bottom half a green (not too dark, but definitely not too light either) and the top half cream.  Here are some of my inspirations...

The green is a little to light for me but it incorporates the green and cream. 

Granted this is for a little girl, but I like the darker shade of green.  Find it here.

This has the two tones, but I was thinking more of the darker green on the bottom and cream on the top.  Find it here.

And I think this one ended up being my favorite.  We aren't doing stripes on the bottom, but it's the closest to what I am looking for!  Find it here.

I went to Home Depot and picked up at least 20 different paint cards.  No I am not joking.  But I think we have it narrowed down and are ready to paint when we actually have a free weekend! (Come on mid July!)  This momma is nesting!

While my mom and I were at Target one day, I found an adorable blanket/bedding set that I completely loved, tied in with my colors, and was a perfect fit for me!  It's going to be the kind of "theme" for our nursery.  (I'm hesitant to say theme because I want to find a lot of unique pieces that mesh, not everything the same, so I'll tread lightly when I say "theme" :) haha)  Here it is...

Too sweet. :)  You can see it here at Target.  Mom and I are going to grab it soon, just in case we can't find it later.  I would be bummed!


At this point, especially if you follow me on pinterest or have been in our living room at our house, you know I love trees.  Therefore, when I started finding wall decals of trees in nurseries, I knew I had to have one!  And it would match my colors perfectly.   Here are some of my inspirations...


Love putting shelves up on the branches idea...  Find this here.

Again, love the shelves and like the simple design with the birds.  Find this here on etsy.

I like that the leaves are different colors on this tree and it has a more whimsical feel.  (I tried to find the original link but it's no longer on etsy.)

The only part I dislike about these decals is the price.  The cheapest one I've found is $82.00, and that just seems a bit pricey to me, especially when we have a lot more important baby things to be thinking about!  Colby has suggested that I paint one.  I, however, am not so sure about that idea!  We'll see what this bargain shopper can come up with!


The awesome thing is we already have a great start on furniture for our nursery.  We have the crib picked out, not bought yet, but at least chosen.  I found a great changing table at a garage sale for $25!  All it needed was a good scrub and a little touch up paint.  Here it is looking pretty...

I had already taken a dresser from Mom and Dad when we first moved into this house for the spare bedroom.  I repainted it and fixed it up a bit.  I knew one day I'd want to use it for a nursery.  I went to Hobby Lobby and purchased new drawer pulls to match the room for the top four drawers and voila!  New dresser!
(PS- that awesome tree picture is taken by my uncle Tim... Can't wait to frame it!)

And last but not least, I had been looking on craigslist, kinda just keeping my eye out for some deals on things we could possibly use.  My rule for craigslist is a.) I never go alone to look at something/pick it up and  b.) I only buy things that can be washed thoroughly by Colby and I.  Case in point- our bistro set of glass table and chairs, our patio chair and table set, and now my newest craigslist purchase... a rocker!

I had been looking and found an ad for a very nice looking rocker.  I didn't really pay attention to the brand name or anything.  I saw it was in a nearby city and it looked nice.  The family had said they outgrew it after moving.  Colby and I went to check it out.  First of all, um wow! is all I can say when we pulled up to the house.  It was huge and beautiful.  The family was very nice and showed us the rocker.  It was in AHmazing condition and was the perfect color to match the nursery.  Better yet, it's brand was Dutailier (which I had never heard of) but after researching, they retail around $400.  And we bought our gently used one for $125!  Wooooo! Happy day!  We got it home, cleaned the wood frame, washed the cushions, and now it's a perfect fit in our nursery!  
(The monkey is from one of my kiddos at the end of the year :) too cute!)

In my next post, I am going to compile a list of little projects I'd like to complete before baby boy gets here to add to the nursery.  For now, I have a rather large to-do list screaming my name before we leave for an 8 hour drive tomorrow- yikes!  Hope you are having a wonderful day!


Wednesday, June 20, 2012

A few projects...

Whew!  It's been a busy start to our summer!  Here I thought I would have a lot of extra time to get things done around the house, catch up on projects, and blog... yeah right!  Luckily, this week is somewhat free so I've had some extra time to get caught up.  We started our summer with friends coming to see us and picking up our extra dryer (yay for more garage space now!).  It was quite an adventure for them to get here -imagine trucks breaking down, problems renting a truck to take the garage back, etc.- but they made it and we had a great couple of days seeing them!  Then, Colby and I celebrated our 3 year anniversary.  Three years blew my mind!  Time has flown by but it has been an amazing three years.  And now we are quickly approaching our biggest adventure yet... the arrival of our baby boy! Yes, it's a boy and we are thrilled!  We've been working on the nursery (A LOT more to come on that later!) and I am super excited!

Here are some projects that I have been working on the past few weeks:

The first was a welcome sign that I had seen on pinterest.  Our front door gets a lot of love from about September-January.  It even gets decorated in July.  However, from about February-June, it's blank and quite frankly, just plain boring.  So when I saw this idea, I knew I had to make it.

You can find the tutorial here.

Here is my version.  I started with a pack of papers by the company "My Mind's Eye" that I bought at Archivers (along with the blue and white string) and I combined it with some other odd scraps and tags that I have collected while scrapbooking.  I cut out the letters using yellow cardstock with my Cricut machine.  I bought the frame at Goodwill for $3 and got rid of the glass and ugly flower picture within it.  Then I touched up the paint on the sides and I was ready to go!


I cut out various shapes and sizes of the tags and began stapling them to the string using mini staples, one strand at a time (3 total).  I kind of tried to follow the tutorial is shapes and placement but I changed my mind a couple of times as well.  When I was done, I wound the string around the frame and secured it in the back.  I couldn't wait to put it on our front door.  Our door looks much cheerier now!!
Pack of papers: $6 (with a 30% off)
String: $2
Frame: $3
Tags and staples: Free, already had extra
Total cost: $9  

My second project was for our anniversary.  I was working on a congratulations card for our friend who was graduating and I noticed that one of my Cricut cartridges had some really cute silhouettes of couples doing different things (it was the "Sweethearts" cartridge incase you want to know).  I thought to myself, "That would make a really cute anniversary card somehow."  I started cutting and creating and suddenly, 2 hours had passed and I had a really cute anniversary card for Colby.  Here is what I did...

I started with having the Cricut cut the silhouettes onto tag shapes.  There were 5 silhouettes in all.  One of a couple dancing, a couple sharing dinner, a man proposing, a couple dancing at a wedding, and a woman pushing a baby carriage.  I thought this was a sweet representation of big moments in our lives together... dancing in the park on our first date... a million dinner dates out... Colby proposing... our wedding... and now our new little one on the way!

After all the tags were cut out, I glued black paper to the black and then adhered them to vintage style papers I had saved.  The last tag I made as a place where I could write my message to him.


When it was all done, I added the final touches of writing a little description of each moment we had shared, and then tied it with a ribbon at the top.  I was pretty pleased overall.

We had a great night celebrating our anniversary by eating, believe it or not, pancakes! (Hey, a pregnant girl does have her cravings!)  We watched our wedding video and enjoyed a glass of sparkling grape juice since wine and champagne are out of the question for now.  We gave each other our gifts and then had to get ready for our vacation we were leaving for the next day.  My gift for Colby was very appropriate for the next day's activities- a new set of luggage!  Here were my surprises...

 An absolutely beautiful crystal heart necklace and a "I Spy" photo album with a list of things to find/do and take pictures of while we were in Savannah during vacation together.  (I will update on this later when I have the pictures printed and the album finished).  It was so sweet and I am one lucky girl :)

Sorry for the long post!  I'll be making a new entry soon that's all to do with baby boy!!!  I have a lot of ideas for the nursery.  Now it's just getting them in one place and deciding!  Hope you all are staying cool in this summer heat!  This momma is for sure!


Tuesday, April 3, 2012

Big Changes Coming!


Well hello there!  Life has been anything but normal around here for the past few months.  Early in February we found out we were pregnant!  Wooooo!!!  It's been a whirlwind since... waiting for the first ultrasound and the first appointment (which was AHmazing to hear our little one's heart beat and see the baby on the screen)... waiting to tell our families and friends... being so excited and overwhelmed and amazed and a little anxious (plus a few other hundred emotions) all at once!  Needless to say, blogging has not been number one on my list of things I am thinking about daily.  However, since finding out about our little one, I've been itching to start collecting ideas for a nursery, projects, etc.  I'm trying to hold off until we find out if it is a boy or a girl but I really can't help myself!  Thank goodness for pinterest!  I will be sharing A LOT of ideas on here, I am sure, so please bear with me and indulge this new momma for the next few months! :)

I am currently on spring break, which has been a welcomed and much-needed break.  I have been sleeping in, enjoying time at home, and starting on some new projects!  I am planning on making two over the next two days, which I will be posting, but I wanted to share a previous project that I finished about a month ago.  I have a good friend at school whose little boy just turned one at the end of February (on Colby's birthday too!).  I had so much fun making a scrapbook for her to fill in for his first year and here were the results of some of my favorite pages...

First page


 B is for Boy


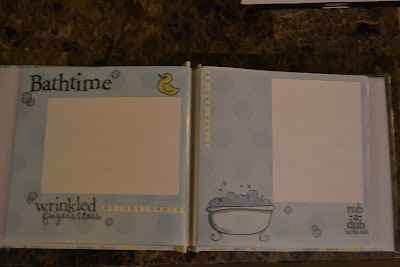
 Bathtime


 Playtime


 Swimming


 Fall


 1st Birthday Party (his theme was Elmo)

I hope to be back on here over the next few weeks with some new projects I'm working on from pinterest and with some new baby ideas!  Hope you all are enjoying the past few days of sunshine, I know I have!