Wednesday, July 3, 2013

A love story

Well hello there.  Long time, no blog. :)  Life got insanely busy once I started back at school.  I'm talking crazy, didn't get much sleep, felt like a wild woman, piles of stuff everywhere, laundry piled up to the ceiling, dishes stacked miles high, messy desk, hair in a ponytail daily kind of crazy!  It really did get easier and life with working, being a mommy and wife and a teacher became the new normal.  I ended the school year on a high note and truly was ready for summer!  Boy did I have plans for this summer!  Somehow, it's taken me a month to catch up (or whatever that means at this point- haha) and now I finally feel like it is time to relax.  And school starts in less than a month... wait, what?!  I keep reminding myself I will like this whole balanced calendar thing come October when I am enjoying a two week fall break.  Not to mention, Landon's birthday party will be smack dab in the middle of that break- woo!!
Anyhoooo...  summer!  We've had a great summer so far!  Really thankful Colby's hours switched almost right before I went on break so we can enjoy a full weekend together.  We went on a small vacation, have spent a lot of family time together, and watched Landon grow and change so much just over the past month!  It needs to slow down. Like now.  But that is for another blog post another time.  :)  Now that I feel like I have caught up on life in general, I have gotten around to making some of the projects on my wish list.  Here was a big one that I finished last week...

          At some point on pinterest (probably when I browsing one night at 2 a.m. while nursing Landon) I saw a pin of a lady who had written her and her husband's "love story" in the form of a book to read to her kids.  I LOVED this idea.  Fairytales and fantasies are wonderful for kids imagination (and our kids will be getting PLENTY of those stories, believe me!) but what about a real life love story?  How sweet would it be for our children to know their very own parents love story that led up to our life now?  I want our son to be respectful to women and a gentleman.  I want my daughter to see how a man should treat a woman.  Who better for a role model than their daddy?  I'm not saying we are perfect by any means, but I want them to know our story.  I want them to know real life love stories, not just ones in fairy tales.

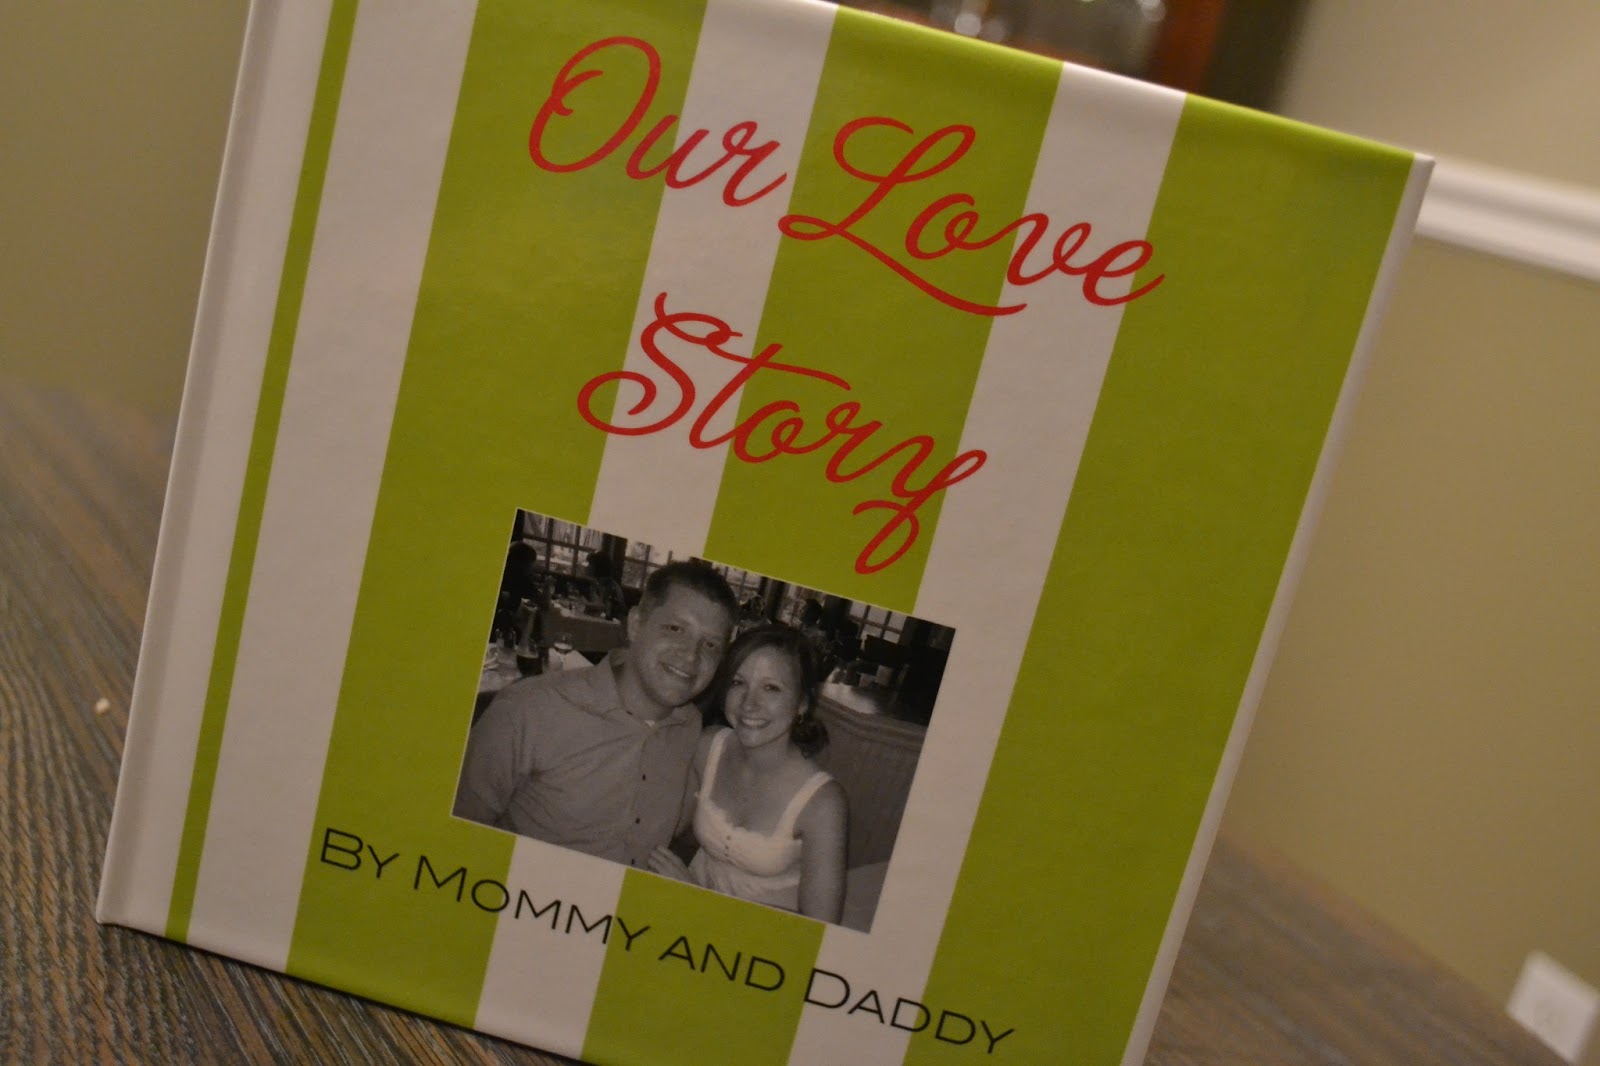
         So my little brain stored that idea in the back of my mind.  Then, lo and behold, I received an email last week from Shutterfly for a free 8x8 photo book.  All I had to pay was shipping and handling.  I was sold!  Colby can attest to the fact I could be described as giddy going through the different themes and accents I could use.  Then, I shifted to contemplating over which pictures to use.  Finally, I began writing our story.  I loved replaying the last 5 and a half years in my mind, picking those most important moments, and asking Colby for input along the way.  After two days of adding, editing, rewording, and final proofing, I was more than satisfied with the outcome and ordered it.  When it came today, I ripped off the packaging and eagerly flipped through each page.  It's perfect and I love that we will be able to read it to Landon and hopefully our other children someday.  Here's a quick peek at how it turned out...

Front cover...


The beginning...


(This page is my personal favorite)


Some of the inside pages...


I wanted to include pictures of our kids but obviously, we don't have all of those just yet. :)  So I left this page blank to add pictures as they come!


Hope you enjoyed my first official blog project in a while!  Looking forward to doing some more creating and updating on some recent projects!  Happy 4th of July tomorrow!  Stay safe!


Sunday, January 27, 2013

Last Day of Leave

Wow... three months have come and gone so fast.  I feel like it was two weeks ago that we were bringing home this sweet little boy from the hospital, a little overwhelmed, very excited, a bit anxious and elated all wrapped up into two brand new parents.  We couldn't get enough of this little guy.  Now I feel like we've turned around and here is this grown up looking baby that is trying to sit up on his own (usually results in an almost-face plant on the couch), trying to roll over from his tummy to his back, and is showering us with smiles and little squeals.  L is healthy as can be and is growing so well that of course I can't complain, but I'm already feeling like it is going so fast!  Today is my last official day of maternity leave and I re-enter the world of kindergarten tomorrow.  While I am so excited to see my kiddos again and see how much they have grown too, I had NO idea just how hard it would be to leave my little guy.  He is going to a trusted babysitter, and I know he will be fine.  However, the mommy in me is screaming!  I have loved, loved, loved spending this time with him.  I have been there for almost every moment, and now I won't be.  That is difficult.  It takes time and it will get easier (so everyone tells me) haha :)  But right now, I am struggling a bit. The great thing is I will have 21 kindergarteners who will be more than ready to give me a hug anytime I need one! On Friday I already had the fact that this was my last weekend of leave on my mind, so I finished up some projects I had been meaning to do for L's nursery as a distraction.  (My ideas came from a previous post- Nursery Ideas- this has all the links to the original creators!)  Here they are:


  Originally, my plan was to buy an actual shadow box.  However, Hobby Lobby did not have the size or the price I was really wanting to spend.  My mom, L, and I were shopping in the scrapbooking area and I ran across this frame.  It actually was perfect.  It does not have as much room between the glass and the backing as a shadow box does but I was not going to need that much since most of the items I would be using were pretty flat.  Plus, this frame was 50% off- score!!  The next day I gathered all the things I wanted to put in- L's first hat and socks, his footprints from the hospital, his bracelet & card, and his newborn announcement.  I arranged them all on cardstock, adhered each piece (used a pin for the socks and hat), and added some stickers from The Paper Studio.  I adore it now and it will be hanging in L's room very soon!


My other project was inspired from this post.  Her canvas ended up a lot cleaner than mine, but I did do mine around 11 pm one night after L went down and I needed some "me time."  I underestimated just how long it would take!  A hour and 15 minutes later I was done!  I didn't want to stop because I was using mixed paint and didn't want to have to replicate the colors the next day.   But 4 am came wayyyy too fast that night! :)  Here was the beginning:

I used a canvas from Hobby Lobby and acrylic paints.

I found that Q-tips made the circles very easy to make. Paintbrushes- not so much.  The blogger in the original post used her fingers, which would have been a great idea too!  I mixed the paint and then started making a lot of circles in various colors and sizes!

                     (Like my makeshift paint tray?!)

And the finished product:


My whole purpose in this canvas was to encourage L to turn his head to the left while he is on the changing table (he loves his right side and is constantly facing that way).  It was a success! He loves looking at it and often tries to bat his hands and touch the dots.  Love it! 

Thank you for enduring my anxiety-ridden beginning and not judging too harshly. :)  I hope this is a great week for you, and send some good thoughts my way so maybe the transition won't be so hard for me.  


Sunday, January 20, 2013

Planning Ahead: Meals!!

Well after quite the hiatus from blogging, I am back! Now, I can't say how often I will be writing, but I will try to post when I've had an exceptionally good project.  Today's project was not my usual- no scrapbooking, Cricut cutting, paint applying, or Sharpie-using. :)  It was cooking!

I have been very blessed the past three months.  First, by the arrival of our son Landon!  He arrived on a beautiful day in October weighing 9lbs and 5 oz!  Mommy and Daddy were so overjoyed and proud, but more on that later! :)  As I was saying, I have been very blessed to be home with him the past three months.  We have loved spending our days cuddling, reading, playing, and napping!  Sadly, my maternity leave is coming to an end in a week.  I am very nervous about going back to school and balancing being a teacher, a wife, a homemaker, and a mommy.  Especially since Colby is back in his evening masters classes this semester.  Before Landon arrived, Colby and school were my life basically.  I stayed until late most nights, came in at least one day on the weekend, and took things home as well.  As you can imagine, my priorities have changed.  While I still want to be the best teacher I can be, I have the most special little boy in the world waiting for me at home and I am going to try to not am not going to be spending the hours at school like I did before.  The other thing I have considered is making dinner.  When I get home, I'm just going to want to cuddle my little bug- not cook.  I needed a plan.  I was on Pinterest a couple of weeks ago and saw a couple of pins about freezer cooking.  I started to look into it and realized this was just what I needed.  Today was my freezer cooking day and it went really well!  Granted, there were a lot of interruptions, but overall, it took me about 3 hours to make 15 meals!  Not too shabby!  And I know how much I will LOVE this in a couple of weeks.

I posted a picture on Facebook of the process and had a few people ask about how I did this, so here we go!  First, I researched a lot of pins and websites that had anything to do with freezer meals.  I quickly discovered that I wanted to make crockpot freezer meals.  I can thaw it the night before.  Colby is often home at lunch so he will be able to pop it into the slow cooker and it will be ready by the time we get home!  Add a veggie and maybe some rolls/pasta and ta-da! Dinner!  I was hooked.  Then, it became finding the meals that a.) I could eat since I am currently dairy-free and b.) that we would like!  I found some great websites with a lot of yummy recipes.  The website where I got most of the recipes is here.  She is awesome and gave GREAT tips for freezer cooking!   Here are the meals I made with the link to each recipe:

Cilantro Chicken
Pasta and Fagioli Soup (made into two servings)  - imitation of Olive Garden's soup
Black Bean Taco Soup
Honey Garlic Chicken
Savory Chicken (made into two servings)
Mongolian Beef
Island Chicken (made into two servings)
Chicken Fajitas
Slow Cooker Beef Tips
Chicken Caccitaore
Chicken Tacos
Teriyaki Chicken

A lot of these websites have more recipes on them as well- they just didn't fit my taste/dietary restrictions. :)

The first thing I did to prepare for my day was to copy the recipes and make a huge shopping list.  The bill may have made me swoon a bit, but my thought was Hey! This will feed our family for almost a month!  Plus, I went to Kroger to get the chicken on sale, which helped tremendously!  Plus, I found a use for the elusive can of tomato sauce I bought on accident over a year ago!  See Colby- I do use those cans eventually! :)


Today, it was basically following the recipes and making the bags!  I started by labeling each Ziploc bag with the directions for cooking each recipe and what sides need to go with it, just in case Colby is the one prepping dinner! Or if my mommy brain is running low that day!


 Then, I started with all the chicken recipes. I prepped the veggies, added in the canned items and the spices, and finally cut the chicken and added to the bags.  Then, I moved on to the stew meat recipes, and finally the recipes that called for ground beef.  If I could change something from today, I would have browned the ground beef first before doing anything so it would be completely cooled by the time I needed to use it.  I saved those for last and then had to wait on the beef to cool to complete the bags.  I guess it gave me time to clean up, right??


All in all, today was a great success and it will feel even better when I start back to school and know dinner is not something I have to worry about when I get home!  Here is our freezer with lots of yummy dinners just waiting!


I will (hopefully) have more posts coming soon.  I hope this was helpful and you get inspired to make your nights much easier!


Sunday, August 19, 2012

Lemonade, Cake, Mason Jars, and Birthday Fun

Yesterday was my mom's 50th birthday!  And of course, we had a party!!  If you look back to last fall, we threw my dad a 50th birthday party with a fall theme- chili, campfire, cake, etc.  It was a lot of fun so I was really looking forward to throwing my mom a party too!  I don't know how excited she was about turning 50, but hey, she's becoming a grandma this year, so that has to make it a bit better I think. :)  I was excited because I love summer parties.  I think there are so many cute ideas out there.  I started planning this party in May after getting an issue of Better Homes and Gardens with all sorts of ideas.  Here are just some of the festivities from the day...


Due to the medicine my mom takes for her migraines, she cannot drink pop.  It tastes metallic (yuck!).  So I had seen a couple of different lemonade recipes and ideas on pinterest and in my lovely issue of Better Homes and Gardens.  I decided to have a lemonade bar.  We had regular lemonade, strawberry lemonade, and blueberry lemonade.  We also had sweet tea.  (I'll include the recipes for the lemonades at the bottom of the post).  I used some doilies we had received from our wedding, along with daises and floating candles in Mason jars to create our table.  Here was the finished product....

I loved the little pennant border along the table as well-  thanks to My Mind's Eye paper and my Cricut :)

I also adore Mason Jars.  I think they are so cute and classic.  So, I wanted to tie them into the party somehow.  I bought two cases of pint sized jars (thank you to canning season almost being over and Walmart having them on sale!).  My hubby actually was really good at stamping tags, so we cut and stamped tags for everyone to write their name on, and we cut ribbon to tie the tags onto the jars.  When our guests came up to get lemonade, they had to grab a tag, write their name, tie it onto the jar, and voila!  No mixed up Mason jars! Here's a pic...

Lemonade was not the only thing we served though!  We had some yummy snacks as well.  We had veggies and dip, buffalo chicken dip, fruit slush, chips and salsa, and cheeseball & crackers (thank you to my brother's girlfriend Raeanne for bringing this yumminess!!)  Here's the food table.  I just couldn't resist!


And of course, we had cake!!  Funny story there... my whole family loves Marsh cakes, mostly because of the icing.  We are buttercream icing freaks.  None of that whipped stuff for us.  Well, I ordered the cake on Thursday and said specifically, we want buttercream icing.  No problem.  On Saturday, Coop, Raeanne, and I went to Marsh to pick it up, along with daisies and the seemingly hard to find blueberries.  I got a glimpse of the cake and all looked great.  However, when we got home and opened the box to put it out, I thought the icing looked awfully soft and shiny.  Yup, whipped icing.  So at this point, it's 1:15, the party starts at 2, and I have a cake that I know people will eat but not love.  I quickly called the bakery department and asked if there was anything they could do.  Amazingly, they said give us 20 minutes and we'll have a correct one ready.  Colby went to get it (along with the ice cream that I had completely spaced- thank you baby brain!) and all was well.
Behind the cake table, I ran ribbons across the window and used clothespins to hang pictures of Mom growing up along with recent ones too.

Oh, and those pretty flowers?!  Present from my dad for Mom that matched the theme and the colors perfectly- way to go Dad!!

As for the lemonade recipes... I made "homemade" lemonade using this recipe:
First, I made a simple syrup.  Heat 1 cup of water and bring it to a boil.  Whisk 2 cups of sugar in and heat until dissolved.  Let it cool.  (This can be stored in the refrigerator for quick lemonade).  I tripled this recipe.

Then, I poured 5 cups of water, 3/4 cup of lemon juice, 1 cup of the simple syrup, and ice cubes into a pitcher and stirred well!  To make the strawberry/blueberry/whatever berry you like lemonade, we mashed the berries (whole package) in a bowl, mixed it in with a small cup of lemonade, and then added it to the pitcher.  Yum!!!

All in all, it was a beautiful day!  We had a great time seeing Mom enjoy her day and the weather couldn't have been more perfect.  We ended the night having a little fire and enjoying some more family time.  Happy 50th Birthday Momma!


Wednesday, July 25, 2012

Love Story Project

So here I was last week, surfing pinterest, pinning far more things than I have time to accomplish, when I see a frame with a quote in it that I loved.  It said "Every love story is beautiful but ours is my favorite."  Well you can bet I clicked on that link as fast as I could (and pinned it of course!).  It took me here.  It was a online vintage boutique that sold the frame, but of course, they were sold out.  I had gotten my hopes up a bit because I have been looking for something new to hang over the headboard in our bedroom.  The frame we had there just seemed too small and boring.  I studied the picture for a while and decided that it would not be difficult to make, especially since I made a similar project for the nursery just a couple of weeks ago.  So I set out Sunday afternoon to see what I could find to make this work.

I began at Goodwill and found a frame that was perfect.  It was brown and a little beat up, but I was going to distress it a little anyway.  It already had character.  The frame was big too.  I wasn't going for an 8x10, more like a 16x20 or bigger.  I found it!  And it was only $10.

I got it home and washed it up.  Let me tell you, the prints behind the frame were way outdated so who knows how old this thing is!  I removed the glass, threw away the prints, and began painting the frame.  This took a few coats.

I left the frame to dry and came inside with the glass.  On the computer, I went through all the fonts I have and found the two that would be perfect for the print.  I typed up the quote and then resized everything (to 130+).  I printed it off and cut out the words.  The last step was to tape them to the back evenly.

The last step (and the longest) was to trace over the words with black Sharpie marker.  (Brand new markers with sharp points are a good idea.)  I have found that it works best to trace over it once, then go back over carefully to darken the lettering.  I added a few of my own touches to the letters.  Boy, I missed being able to lay on the floor on my stomach while doing this!  Baby boy would not have liked that very much :)

When all the lettering was traced and dry, I checked it one more time for empty spots.  Then I got my dry frame, used some sandpaper to distress the edges and give it that worn look.  I used a hammer again to bend the frame hooks backwards away from the glass.  Then, I lined the edges with glue and laid the glass in the frame to dry overnight.

I put it on the wall this morning right above our bed, and I love love love it!  And it was super easy and cheap!  Grand total- $10 for the frame!  Woo!!


I know people were asking on Facebook how to do this so I hope this explains it well! :)  I hope you are inspired to make one of your own- they are so much fun! And addicting!


Wednesday, July 18, 2012

Picture Frame Project (And Updates!)

Well we've had quite the exciting weekend... It flew by in a flash!  We drove to New York Friday afternoon and got there about 9:30.  The next morning was my first baby shower! :)  Colby and my dad played in a church golf tournament while the girls all went to the shower.  It was a lovely brunch shower and we were so blessed to receive a lot of things we will be needing here in 3 short months!! (wow! 3 months!)  We headed home Sunday afternoon after church.  I will be honest and say I had a moment going home... like a serious pregnant lady moment.  I think because we stayed for church and I am used to leaving early on driving days, it felt like we had been driving ALL day rather than the few short hours we had been.  At about 5 o'clock, somewhere in the middle of Ohio, I was almost freaking out, "I have to get out of this car!!!" Haha :)  Poor Colby...

After we got back, it didn't really slow down!  Again, I felt so bad for Colby because he got called into work at 11:30 Sunday night and didn't get home until 3:30 a.m.  Needless to say, he was pretty tired Monday.  I had a doctor appointment on Monday morning and I was so thankful to hear the doctor say that everything was looking great! :)  Baby boy's heartbeat was 146 bpm and he is growing at a wonderful rate!  All is good, and we couldn't be happier or more thankful.  We also got to pick up the crib Tuesday afternoon and put it together!  I washed all the bedding we got this weekend (thanks Momma!) and had it ready for today when Colby got home with the new mattress.  The nursery is really coming together and looking amazing! (Pictures further down!)

Today, I decided to work on a project from an idea I had discussed in my last post.  I wanted to make something with the phrase "I love you to the moon and back."   Well, I had found some cute things online but didn't want to pay for them.  I'd looked at stickers in Hobby Lobby but letter stickers sometimes look a little iffy because of the way they are cut.  Suddenly, I remembered I had seen a pin on pinterest where someone had used Sharpie markers to draw owls on the glass of a picture frame and then had left the backs off.  It got my brain going and here is what I came up with...

I started with a frame I had bought at Goodwill for $1.50.  (Wooo!)   I took out the glass and backing and repainted the wood white.  (I also cleaned the glass.)


On my computer, I used the font "Pupcat" and wrote out the words "I love you right up to the moon and back" and I found a little crescent moon clip art that I thought was cute.  Then, I printed the pages, cut out the words and taped them to the back of the glass.  Then, using a brown Sharpie marker, I began tracing the letters and coloring them in.  I switched to the light blue Sharpie for the moon and stars.


When it was all done, I used clear adhesive to secure the glass back inside the frame and it is ready to hang up in baby boy's room!! :)  I wasn't sure how it would turn out but I am pretty happy with the finished product!


Sorry for the shadow... the flash made the letters look odd.  One of the most exciting things was the total cost: $1.50!! I had everything else on hand or made it on the computer! Yay!

Here are some pictures to update you on the progress of the nursery... :)


Our before picture... (walls were tan above the chair rail and dark brown below)


After!!  We are so happy with the colors and love how bright the room is!

More to come later!  Hopefully you are getting some of this wonderful rain tonight! I have forgotten what rain sounds like... it's nice to be reminded.


Wednesday, July 4, 2012

Baby project ideas

As I said in my last post, my plan was to make a list of projects I wanted to complete before the baby is born, or at least soon after he is born - since some of them require the baby :)  Needless to say, I've found a ton of ideas.  Narrowing them down has been the hard part!  I keep reminding myself... there are only 4 walls in his nursery... I don't want to cram every inch with stuff... only limited space...    I'm not sure how well it's working!  Anyway, here are the wonderful ideas I've found on blogs and on pinterest.  I cannot wait to get started!


I have been on the look out for the perfect frame to go around the letters of our little guy's name.  Unfortunately, since we are keeping his name a secret, I won't be able to put it up until after he is born :)


I love this saying and I want it to be up somewhere in his room, so I'm considering making this myself with scrapbook paper and sticker letters.  This one is from etsy.com


If you know my hubby at all, this would be a must have :)  Sadly, there aren't anymore for sale on etsy.com where I originally found it.  Anyone crazy good at crocheting and want to make this adorable helmet for our little guy? :)  Goodness only knows you would not want to see what it would look like if I tried it!


Here are some things I can't quite complete until baby boy is here...


Love, love, love this! We already have the baseball!!


I can't wait to have his newborn photos taken (speaking of which- would love any recommendations!) and then I want to create a collage of pictures on the wall.
(I can't find the original link, sadly)


And the finale, the one I think I am most excited about, is a shadow box.  I love how everything is laid out, and I can picture having one of these for each of our kiddos hanging on the wall in the hallway.  Super excited about this idea- buying the box soon!!

Well here are my favorites I have found so far... I'm sure there will be more as it gets closer.  25 weeks tomorrow!  That means only 15 left! Wow!!! :)  Little guy has been kicking this whole time I've been writing this post- he must know it's about him :)

Hope everyone has a fantastic 4th of July and stay cool!!