Wednesday, July 25, 2012

Love Story Project

So here I was last week, surfing pinterest, pinning far more things than I have time to accomplish, when I see a frame with a quote in it that I loved.  It said "Every love story is beautiful but ours is my favorite."  Well you can bet I clicked on that link as fast as I could (and pinned it of course!).  It took me here.  It was a online vintage boutique that sold the frame, but of course, they were sold out.  I had gotten my hopes up a bit because I have been looking for something new to hang over the headboard in our bedroom.  The frame we had there just seemed too small and boring.  I studied the picture for a while and decided that it would not be difficult to make, especially since I made a similar project for the nursery just a couple of weeks ago.  So I set out Sunday afternoon to see what I could find to make this work.

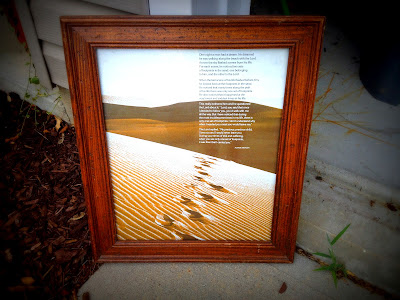
I began at Goodwill and found a frame that was perfect.  It was brown and a little beat up, but I was going to distress it a little anyway.  It already had character.  The frame was big too.  I wasn't going for an 8x10, more like a 16x20 or bigger.  I found it!  And it was only $10.

I got it home and washed it up.  Let me tell you, the prints behind the frame were way outdated so who knows how old this thing is!  I removed the glass, threw away the prints, and began painting the frame.  This took a few coats.

I left the frame to dry and came inside with the glass.  On the computer, I went through all the fonts I have and found the two that would be perfect for the print.  I typed up the quote and then resized everything (to 130+).  I printed it off and cut out the words.  The last step was to tape them to the back evenly.

The last step (and the longest) was to trace over the words with black Sharpie marker.  (Brand new markers with sharp points are a good idea.)  I have found that it works best to trace over it once, then go back over carefully to darken the lettering.  I added a few of my own touches to the letters.  Boy, I missed being able to lay on the floor on my stomach while doing this!  Baby boy would not have liked that very much :)

When all the lettering was traced and dry, I checked it one more time for empty spots.  Then I got my dry frame, used some sandpaper to distress the edges and give it that worn look.  I used a hammer again to bend the frame hooks backwards away from the glass.  Then, I lined the edges with glue and laid the glass in the frame to dry overnight.

I put it on the wall this morning right above our bed, and I love love love it!  And it was super easy and cheap!  Grand total- $10 for the frame!  Woo!!


I know people were asking on Facebook how to do this so I hope this explains it well! :)  I hope you are inspired to make one of your own- they are so much fun! And addicting!


Wednesday, July 18, 2012

Picture Frame Project (And Updates!)

Well we've had quite the exciting weekend... It flew by in a flash!  We drove to New York Friday afternoon and got there about 9:30.  The next morning was my first baby shower! :)  Colby and my dad played in a church golf tournament while the girls all went to the shower.  It was a lovely brunch shower and we were so blessed to receive a lot of things we will be needing here in 3 short months!! (wow! 3 months!)  We headed home Sunday afternoon after church.  I will be honest and say I had a moment going home... like a serious pregnant lady moment.  I think because we stayed for church and I am used to leaving early on driving days, it felt like we had been driving ALL day rather than the few short hours we had been.  At about 5 o'clock, somewhere in the middle of Ohio, I was almost freaking out, "I have to get out of this car!!!" Haha :)  Poor Colby...

After we got back, it didn't really slow down!  Again, I felt so bad for Colby because he got called into work at 11:30 Sunday night and didn't get home until 3:30 a.m.  Needless to say, he was pretty tired Monday.  I had a doctor appointment on Monday morning and I was so thankful to hear the doctor say that everything was looking great! :)  Baby boy's heartbeat was 146 bpm and he is growing at a wonderful rate!  All is good, and we couldn't be happier or more thankful.  We also got to pick up the crib Tuesday afternoon and put it together!  I washed all the bedding we got this weekend (thanks Momma!) and had it ready for today when Colby got home with the new mattress.  The nursery is really coming together and looking amazing! (Pictures further down!)

Today, I decided to work on a project from an idea I had discussed in my last post.  I wanted to make something with the phrase "I love you to the moon and back."   Well, I had found some cute things online but didn't want to pay for them.  I'd looked at stickers in Hobby Lobby but letter stickers sometimes look a little iffy because of the way they are cut.  Suddenly, I remembered I had seen a pin on pinterest where someone had used Sharpie markers to draw owls on the glass of a picture frame and then had left the backs off.  It got my brain going and here is what I came up with...

I started with a frame I had bought at Goodwill for $1.50.  (Wooo!)   I took out the glass and backing and repainted the wood white.  (I also cleaned the glass.)


On my computer, I used the font "Pupcat" and wrote out the words "I love you right up to the moon and back" and I found a little crescent moon clip art that I thought was cute.  Then, I printed the pages, cut out the words and taped them to the back of the glass.  Then, using a brown Sharpie marker, I began tracing the letters and coloring them in.  I switched to the light blue Sharpie for the moon and stars.


When it was all done, I used clear adhesive to secure the glass back inside the frame and it is ready to hang up in baby boy's room!! :)  I wasn't sure how it would turn out but I am pretty happy with the finished product!


Sorry for the shadow... the flash made the letters look odd.  One of the most exciting things was the total cost: $1.50!! I had everything else on hand or made it on the computer! Yay!

Here are some pictures to update you on the progress of the nursery... :)


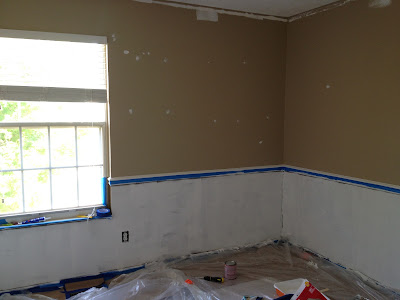
Our before picture... (walls were tan above the chair rail and dark brown below)


After!!  We are so happy with the colors and love how bright the room is!

More to come later!  Hopefully you are getting some of this wonderful rain tonight! I have forgotten what rain sounds like... it's nice to be reminded.


Wednesday, July 4, 2012

Baby project ideas

As I said in my last post, my plan was to make a list of projects I wanted to complete before the baby is born, or at least soon after he is born - since some of them require the baby :)  Needless to say, I've found a ton of ideas.  Narrowing them down has been the hard part!  I keep reminding myself... there are only 4 walls in his nursery... I don't want to cram every inch with stuff... only limited space...    I'm not sure how well it's working!  Anyway, here are the wonderful ideas I've found on blogs and on pinterest.  I cannot wait to get started!


I have been on the look out for the perfect frame to go around the letters of our little guy's name.  Unfortunately, since we are keeping his name a secret, I won't be able to put it up until after he is born :)


I love this saying and I want it to be up somewhere in his room, so I'm considering making this myself with scrapbook paper and sticker letters.  This one is from etsy.com


If you know my hubby at all, this would be a must have :)  Sadly, there aren't anymore for sale on etsy.com where I originally found it.  Anyone crazy good at crocheting and want to make this adorable helmet for our little guy? :)  Goodness only knows you would not want to see what it would look like if I tried it!


Here are some things I can't quite complete until baby boy is here...


Love, love, love this! We already have the baseball!!


I can't wait to have his newborn photos taken (speaking of which- would love any recommendations!) and then I want to create a collage of pictures on the wall.
(I can't find the original link, sadly)


And the finale, the one I think I am most excited about, is a shadow box.  I love how everything is laid out, and I can picture having one of these for each of our kiddos hanging on the wall in the hallway.  Super excited about this idea- buying the box soon!!

Well here are my favorites I have found so far... I'm sure there will be more as it gets closer.  25 weeks tomorrow!  That means only 15 left! Wow!!! :)  Little guy has been kicking this whole time I've been writing this post- he must know it's about him :)

Hope everyone has a fantastic 4th of July and stay cool!!